
How did I take this photograph of Karashi?
Last week we were cat-sitting our favorite cats, Moko and Karashi. I took the chance to do some macro photography.
After a third attempt in 2020, it's time to bring this blog back to life! I blame the pandemic for destroying my enthusiasm, I swear, I tried my best!
As some of you may know, one of my favorite things to do in my spare time is capturing worlds with my camera. Since I started learning photography - around 10 years ago now - I've had a very systemic approach to this medium: I get a prime lens and I use it for a few years until I feel like I mostly understand how to work with that specific focal length. I started with a 35mm, then moved to an 85mm for portraits, and around three years ago - right before I quit my previous job - I decided I would jump into the world of macro photography with a 90mm 📸.
Macro
And what a joy it's been to do macro! I hold my camera, I get as close as possible to the subject making sure I don't do any sudden movement, I hold my breath and the world around me vanishes. It's a bit of a strange feeling: macro photography allows me to disappear from the world and - at the same time - be one with it for a few magical moments ✨. It has allowed me to get close and personal with many gorgeous living beings that are too small for us to normally notice. Nature - even in cities - can be the home of so much hidden beauty 🐛🦟🐜🐝🐞.
Macro photography is also the most difficult type of photography I've ever done; it's incredibly technical (requires total understanding of manual control, as well as the need for a flash in many cases) and requires a ton of patience + a sprinkle of luck, as always.
SO a few days ago I thought it would be fun to share how this type of photography works, doing a case study on one specific shot.
Karashi
Last week we were cat-sitting Moko and Karashi, two super beautiful cats. Moko - a Birman - is basically a silly cloud of fluff; Karashi is an elegant and very sweet Bengal 😼. I always look forward to pet-sitting because it's an opportunity for me to take pretty pictures of animals, and to then gift them to my friends, which - incidentally - makes me a very very happy kid.
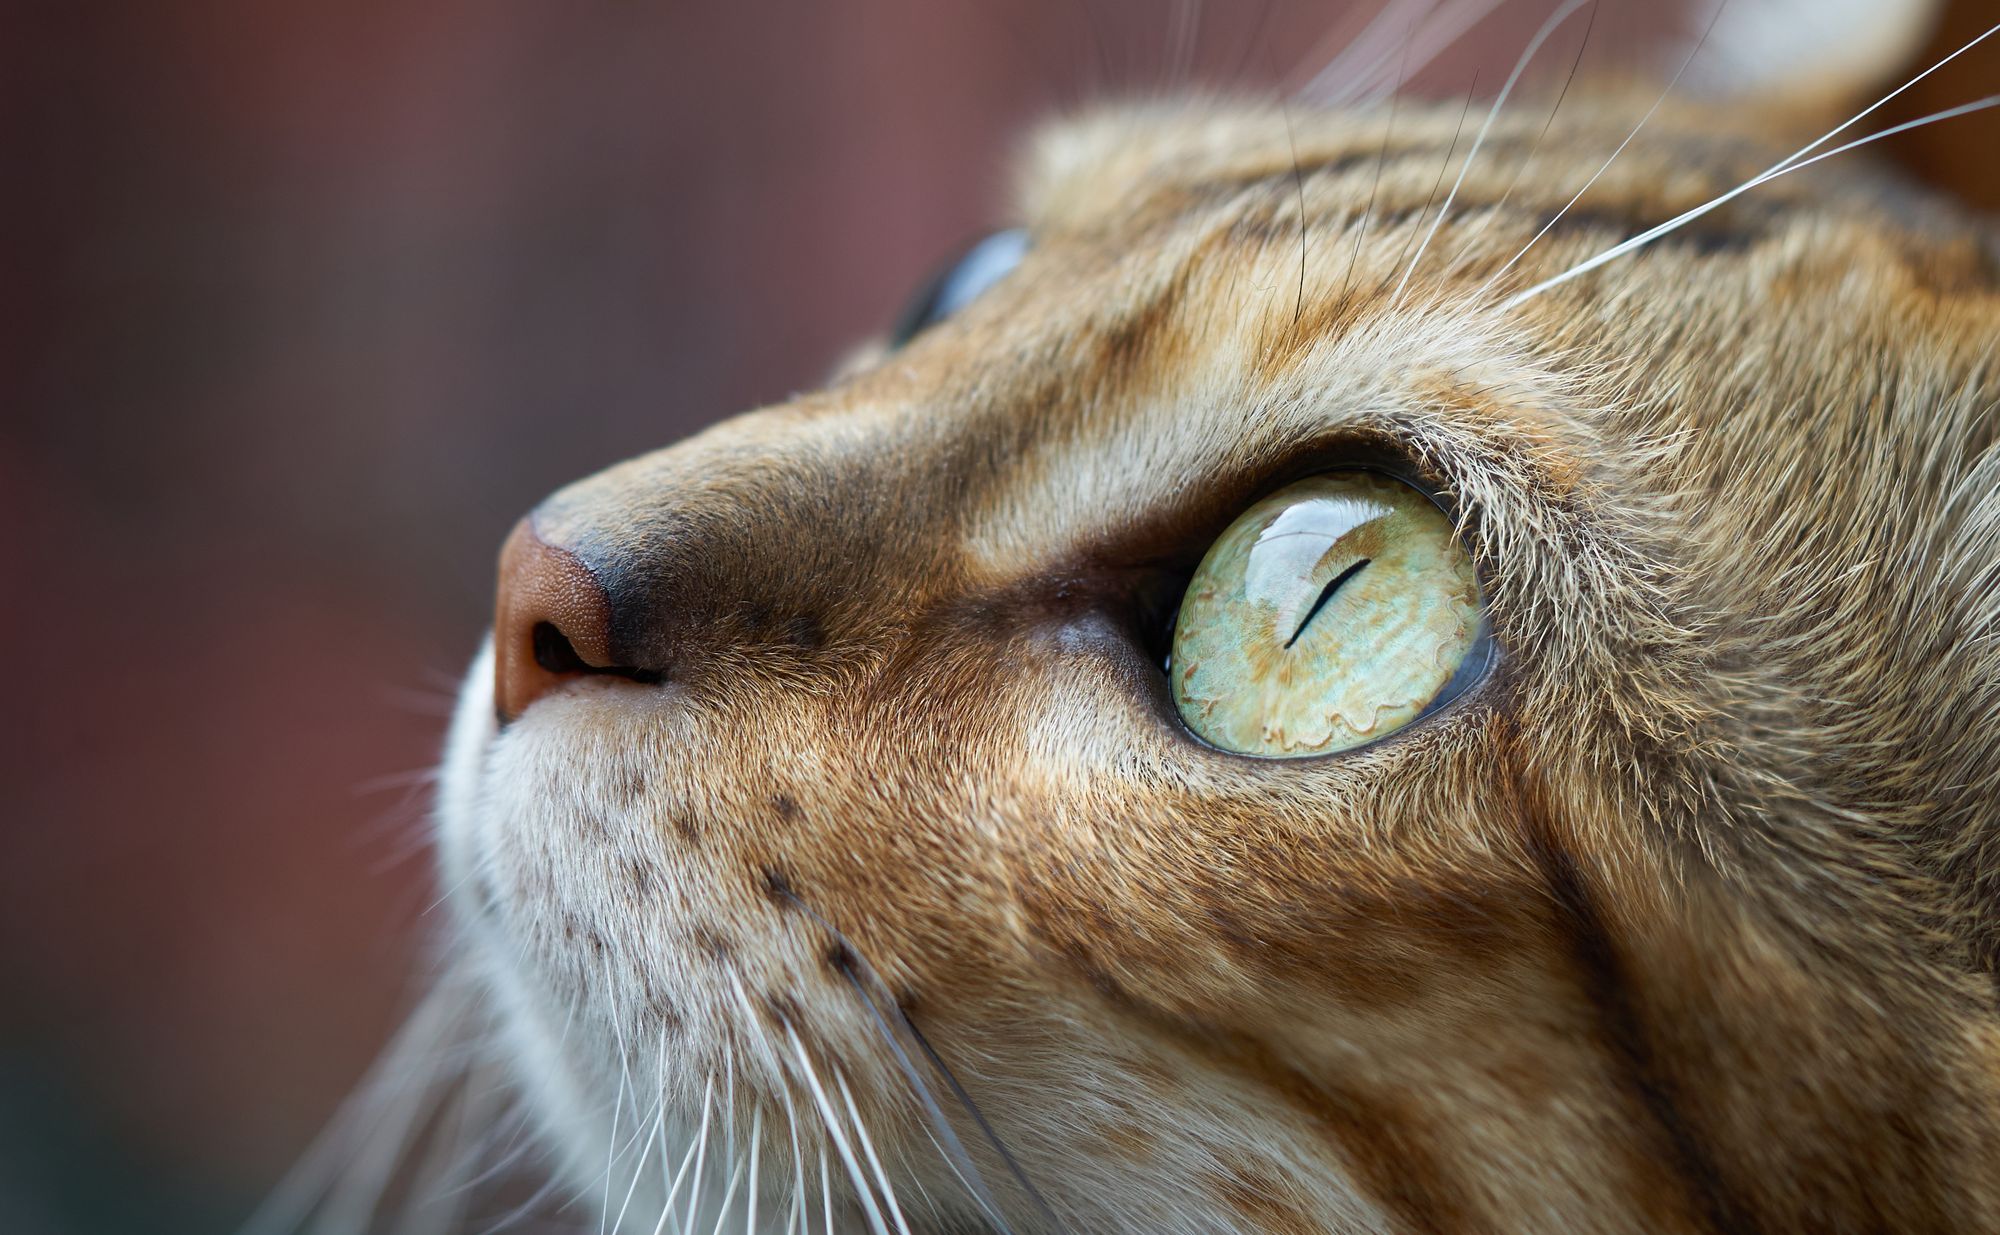
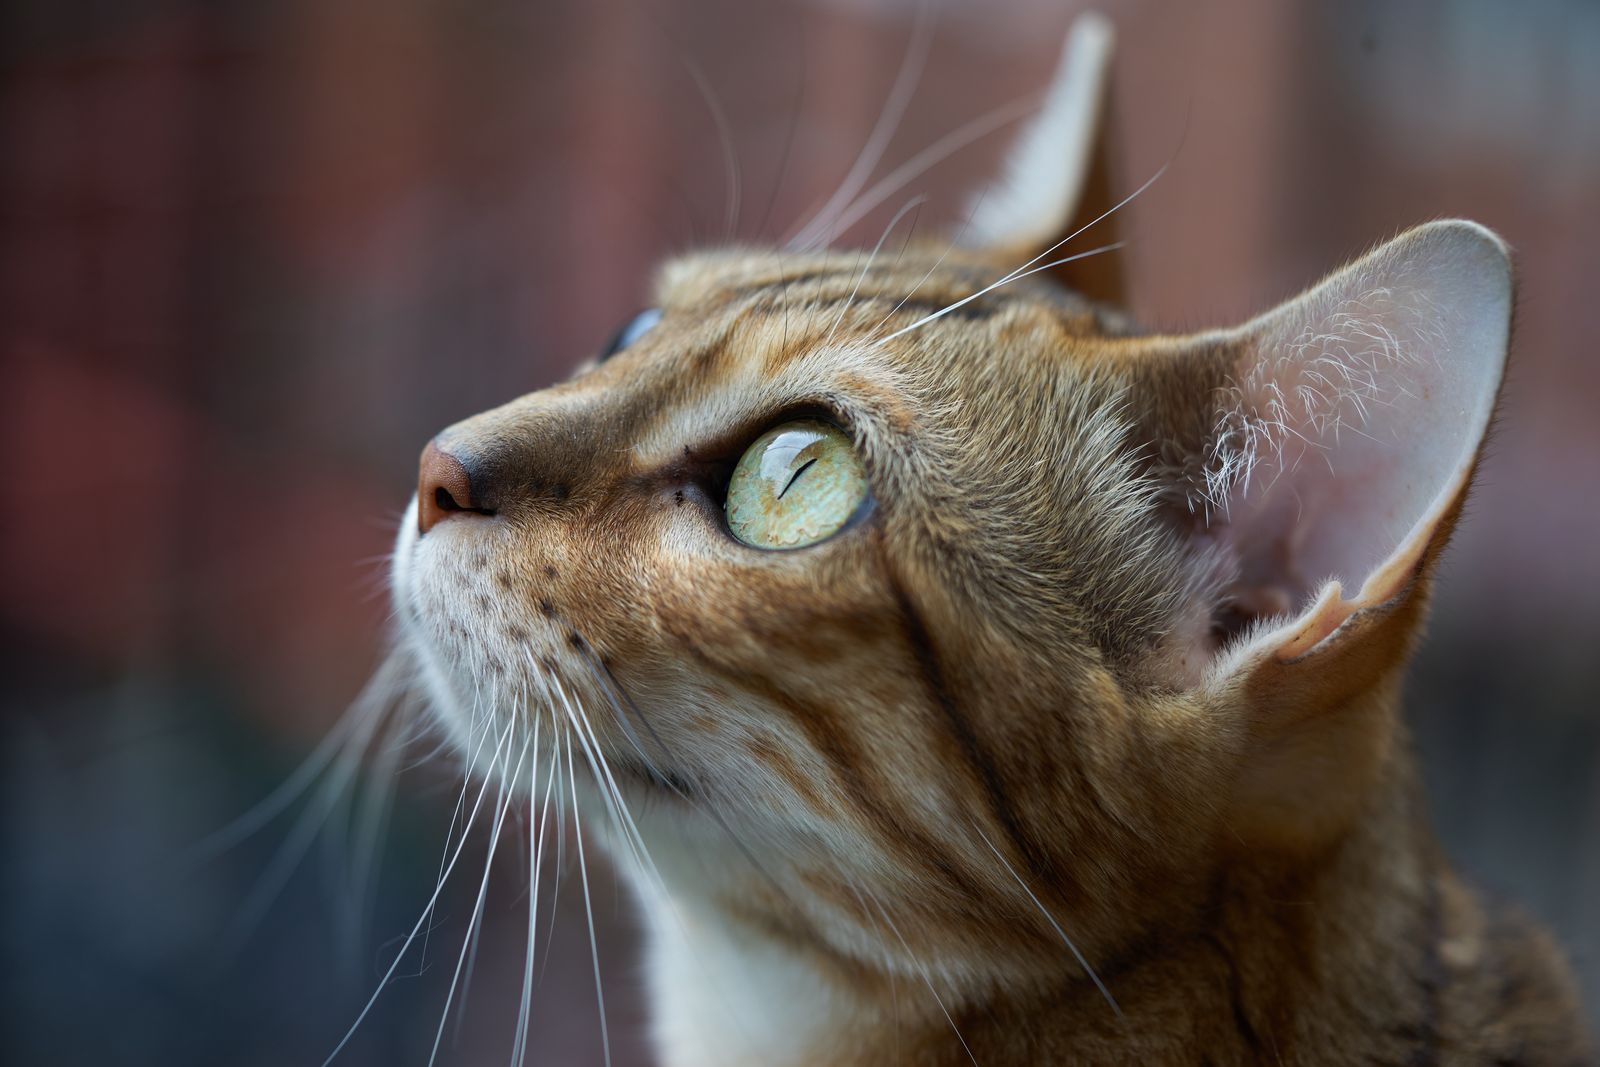
So, meet Karashi, the subject of the shot I am going to talk about:

The ingredients
There are a few things that made this shot possible:
- The subject 🐈
This shot is pretty because the subject is pretty! Karashi has a very elegant silhouette, very beautiful eyes and fairly short hair. Moko has a much flatter face and is full of hair covering some of her features (this is not a diss, you are VERY PRETTY TOO!) . The same shot from this angle wouldn't have worked as well with her! One small but equally important element is that Karashi knows me, so she is comfortable having me around. - The light ⛅
The lighting conditions were great! It was sunny outside but with a bit of clouds, so no need to worry about hard shadows. Shooting during the day allowed me to shoot at ISO 200, meaning there is very little grain on the photo. - The moment ⌛
I noticed that Karashi went on the balcony because there were some birds in the courtyard. This was perfect: cats can be very difficult to photograph because they move quite a bit, but now she was in Hunt Mode, hyper-focused on her target. Similarly, I was hyper-focused on mine. - The gear 📷
Last on the list is the fact that I am holding a pretty old but still great mirrorless camera (Sony a7II), and a lens (FE 90 mm f2,8 Macro G OSS) that is specifically designed to get very up-close to the subject while still maintaining focus.
With all these things in place, it's time to shoot!
One simple shot
Attracted by some birds outside, Karashi jumped on the tiny balcony table, immediately locking on her target. I sorta squeezed between the entrance of the small balcony and the table - it was genuinely quite uncomfortable - and lowered myself to her eye level (this is a super important step when you are trying to capture a nice animal photo).
I leaned onto the viewfinder, set low aperture and high shutter speed (animals move sooo much), waited for the right moment, and then that was it, ONE PERFECT SHOT!
I shared the photo and I was happy with the result.
The lie
FALSE ⛔! Not me, not in this universe! I wish taking photos like this one was so easy! Let's give some clarity.
When you see nice closeup pictures such as this one, you need to know one important thing: tens of pictures were taken in rapid succession to maximize the chance of getting one good shot. The ones you see below are just the ones I kept because the focus was not completely off.
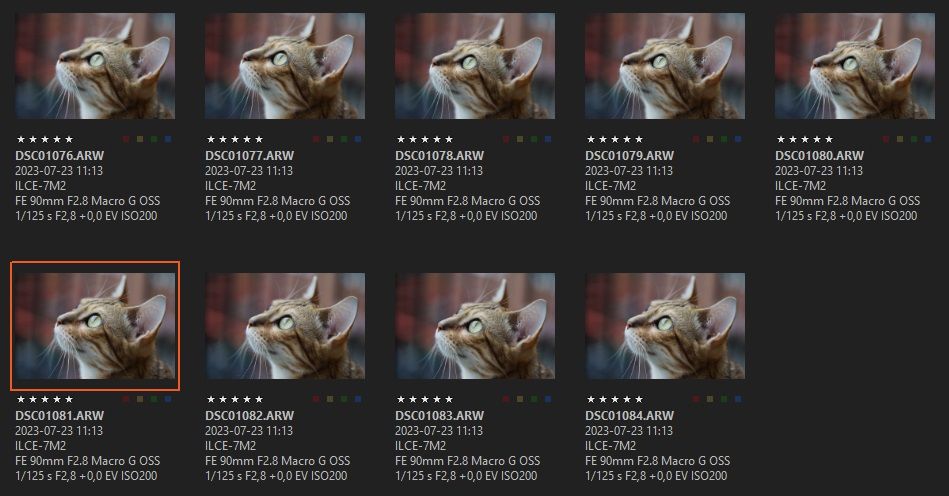
Taking multiple shots is extremely common in any type of modern digital photography, but it's even more important when using a macro lens.
The reason for this is how brutal macro photography is when it comes to the width of the area around the focal plane.
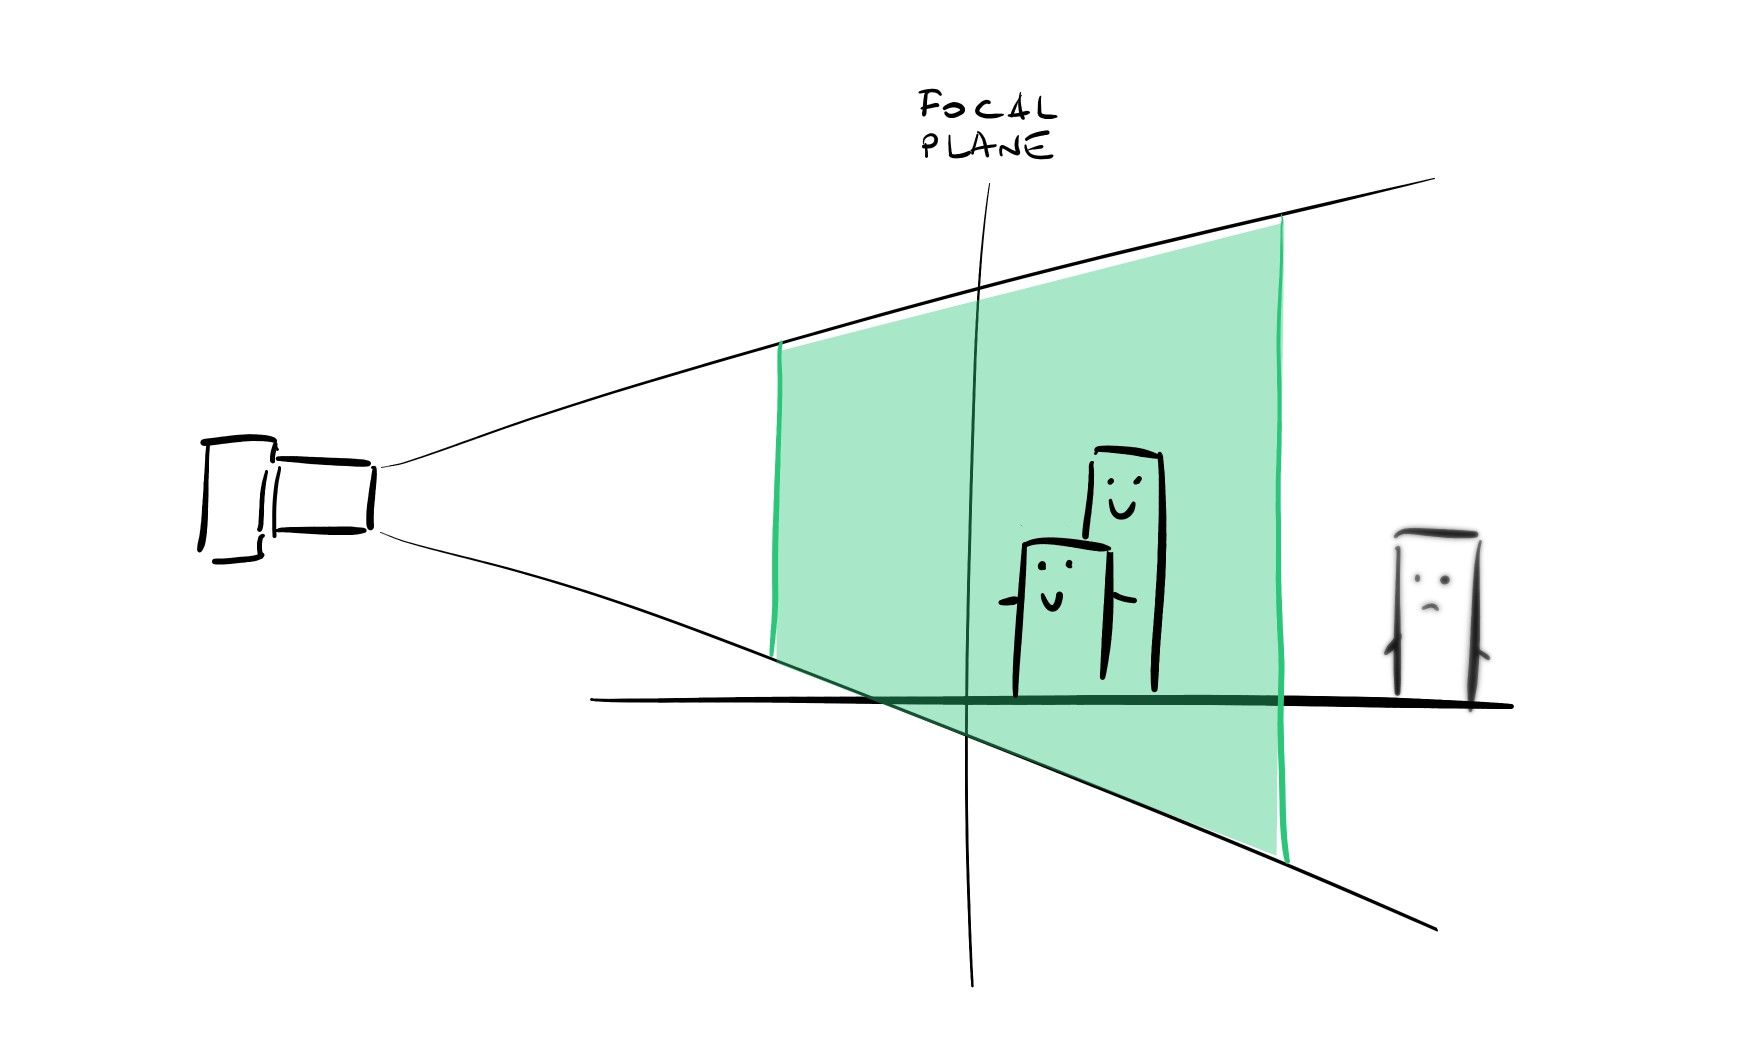
Normally, you have stuff that is nicely in focus and stuff in the background that is out of focus, like in the drawing above. But when it comes to macro - assuming that you are trying to shoot at maximum aperture (meaning you get the highest amount of light and soft blur around the subject) - the closer you get the thinner the area around the focal plane is. But when I say thinner I mean THINNER! For instance - if you are doing super close-ups of insects you literally have a sharp 1mm thick plane to work with📏!
This also means that even just by breathing, you are moving the focal plane and you might be missing the correct focal point. Brutal, I know 😰. This is actually the reason why holding your breath and having a solid stance is so important (and also why some people enjoy doing macro in controlled environment: they use a tripod to make sure everything is perfectly positioned and under control; not really doable with felines).
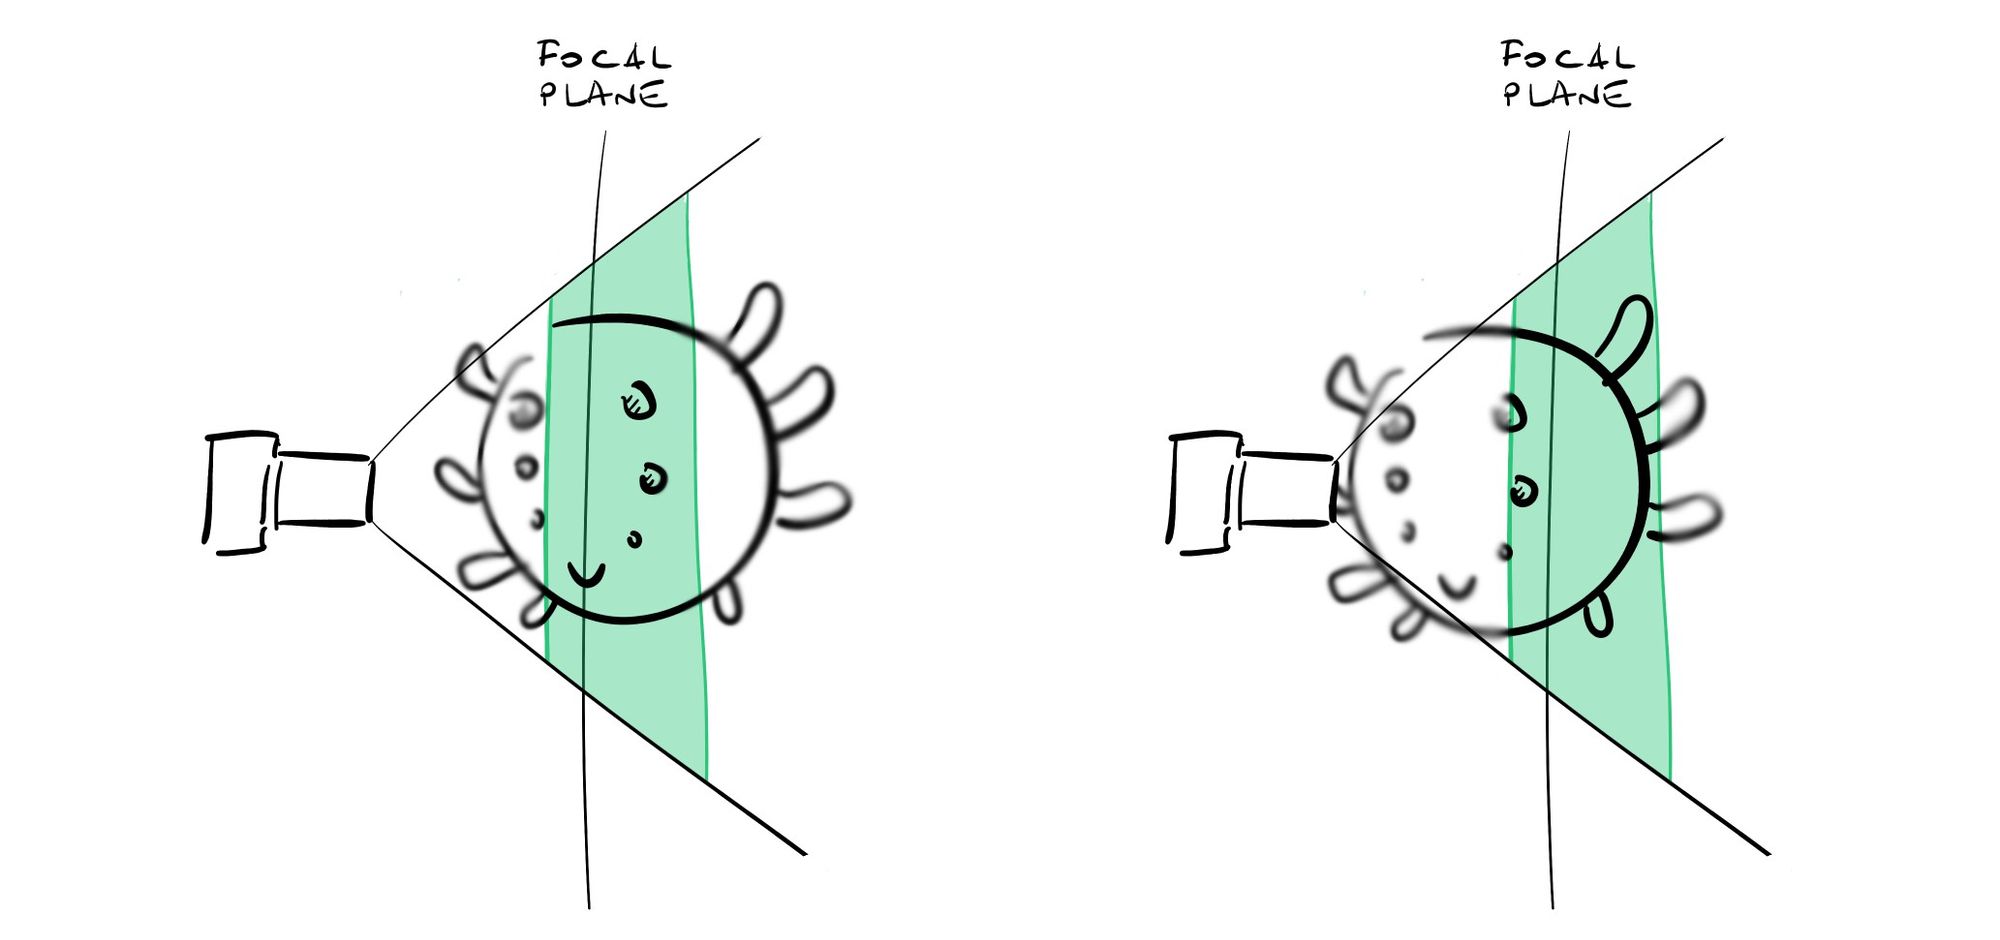
In the case of Karashi's photo, since I am still relatively far from the subject (this shot could count as a portrait photo if you think about it), I have maybe 1cm of her face in focus. For a silhouette photo this means that I need to be really intentional about where the focus is: normally you want the eye to be in focus, but what about the snout!? The snout is too cute and needs to be in focus too for virtual boops!
I could increase the aperture to have a deeper focal area, but that would make the picture underexposed and the background less blurred; we don't want that!
So, there IS a lie 🙀.
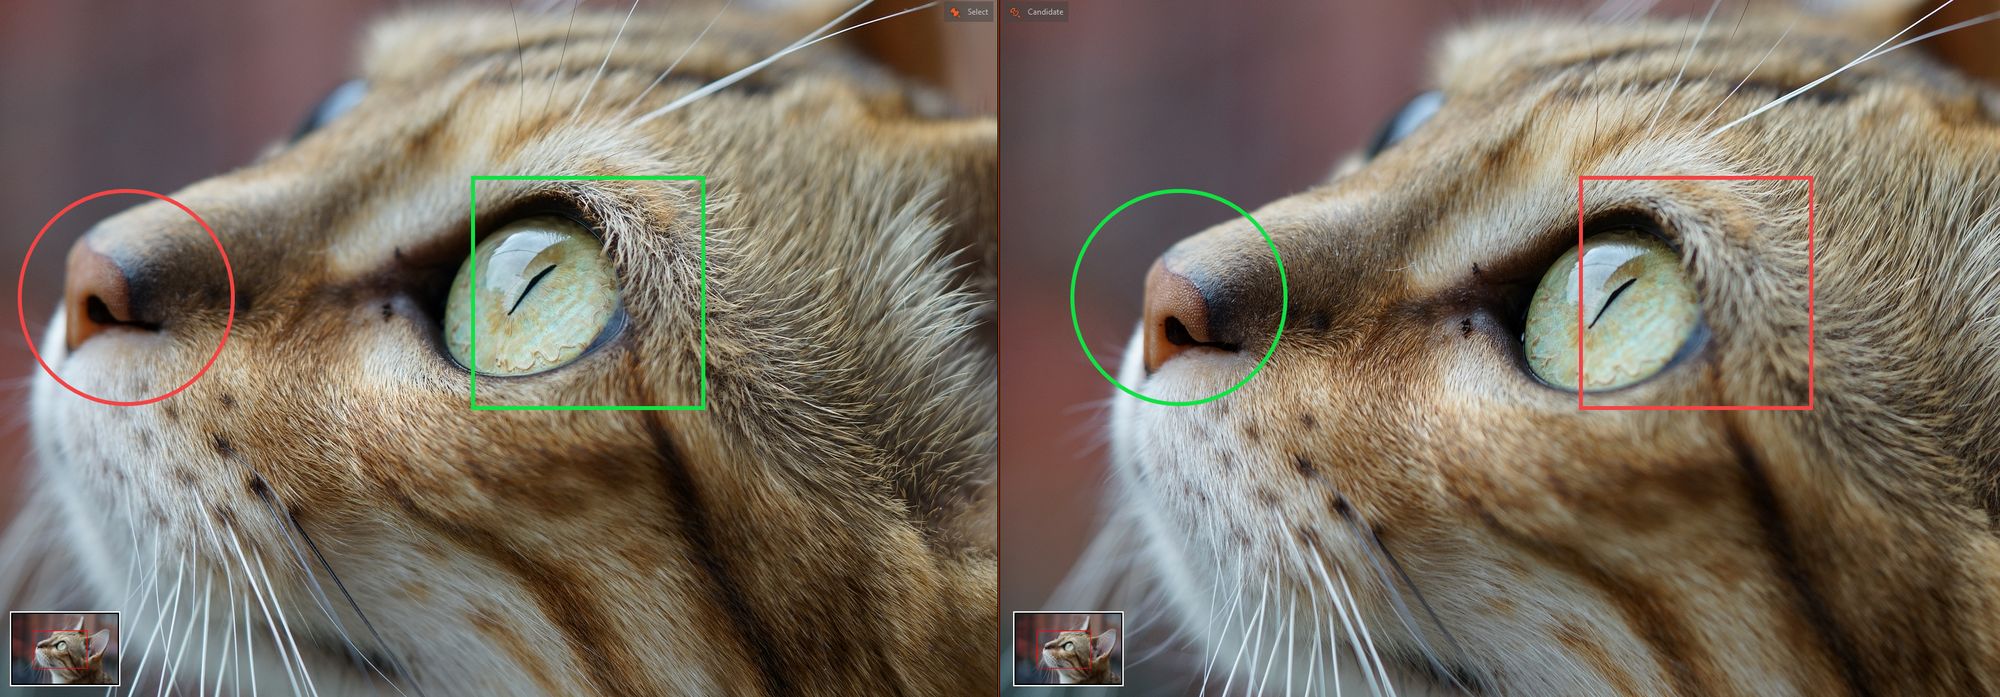
What you see as the final picture is not just a single photograph, but the blend of four different ones with a slightly different focal plane. You can see two of them below:
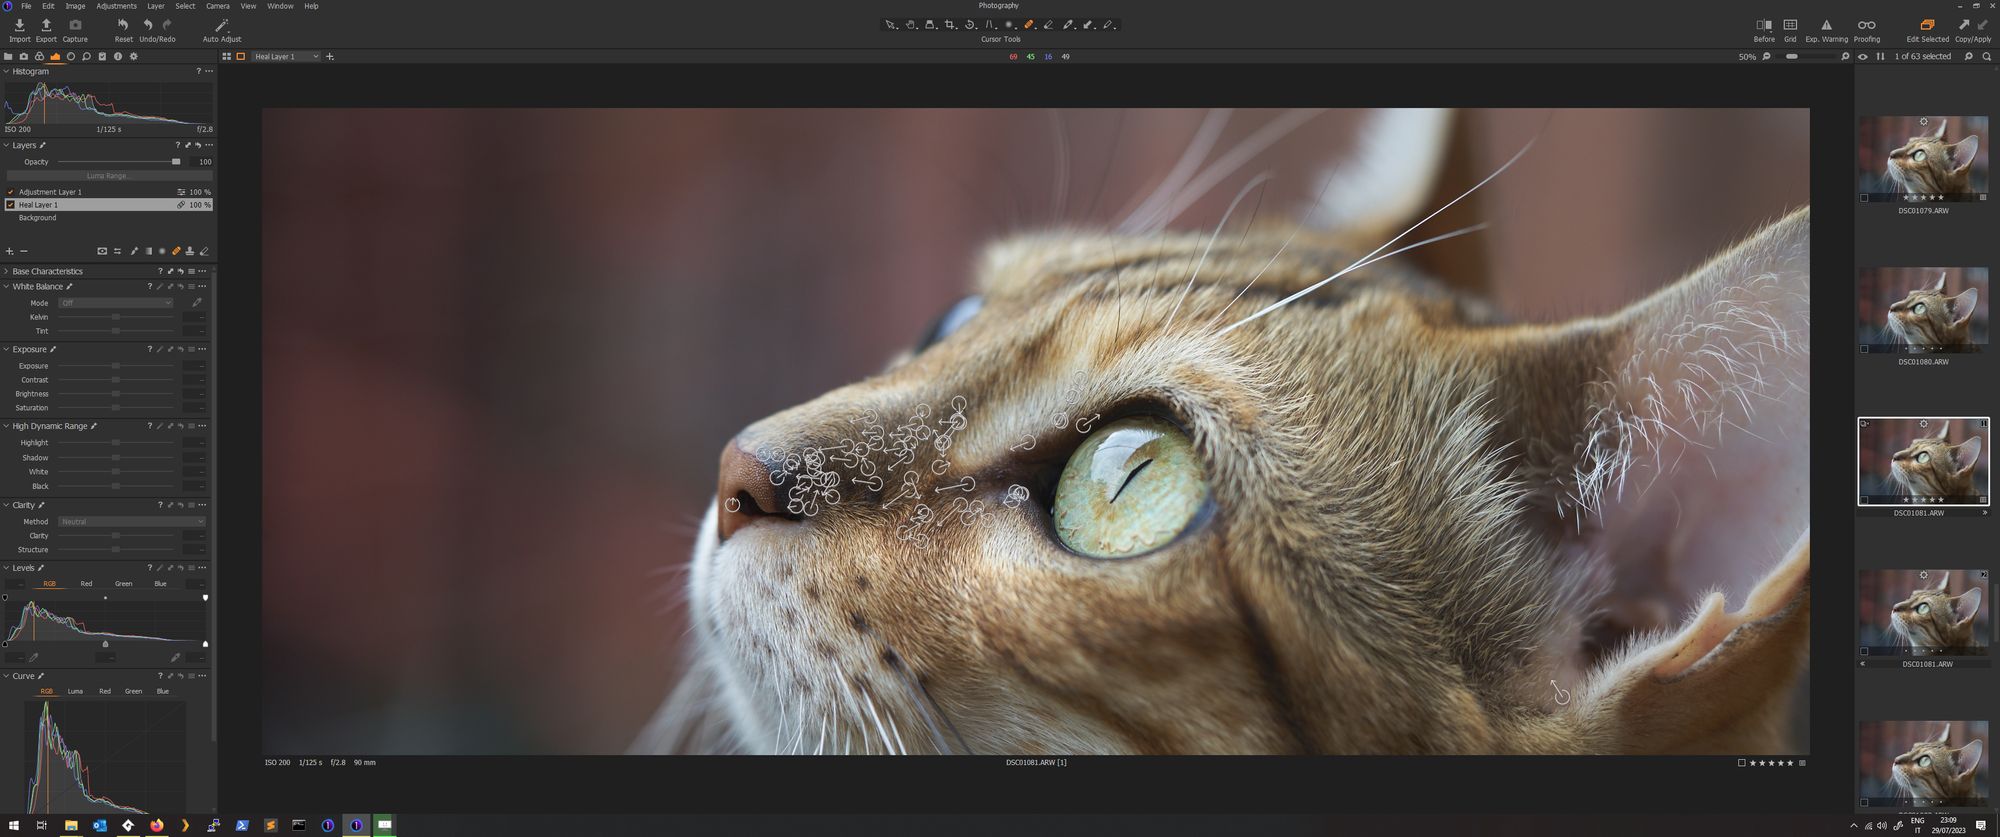
In terms of workflow, the first thing I do is a bit of visual cleanup (I use Capture One 20 to do any form of processing and post-processing, but I am not a fan anymore because they got rid of their perpetual licenses). This phase mostly involves removing some dirt from Karashi's face, as well as slightly increasing the exposure around the face to make it pop a liiiittle bit more 😻.
Below is an interactive slider, courtesy of JuxtaposeJS:
After I am done with that, it's just a matter of aligning the four shots and blending them. For this part of the process I use Affinity Photo.
The way I do this is that I simply put all the photos on different layers, create mask layers and then just brush in the parts of each photo that are in focus. Below you can see a visualization of the different parts in focus, and how they all work together to create the final shot.
Something that you might find interesting is that when you work with insects, you get so up close that you actually need to blend multiple (often tens and tens) of shots. There is even software specialized in that, though I have never really used it because I am lazy that way.
I export the final result, and spend half a day writing a blog post about it 📜.
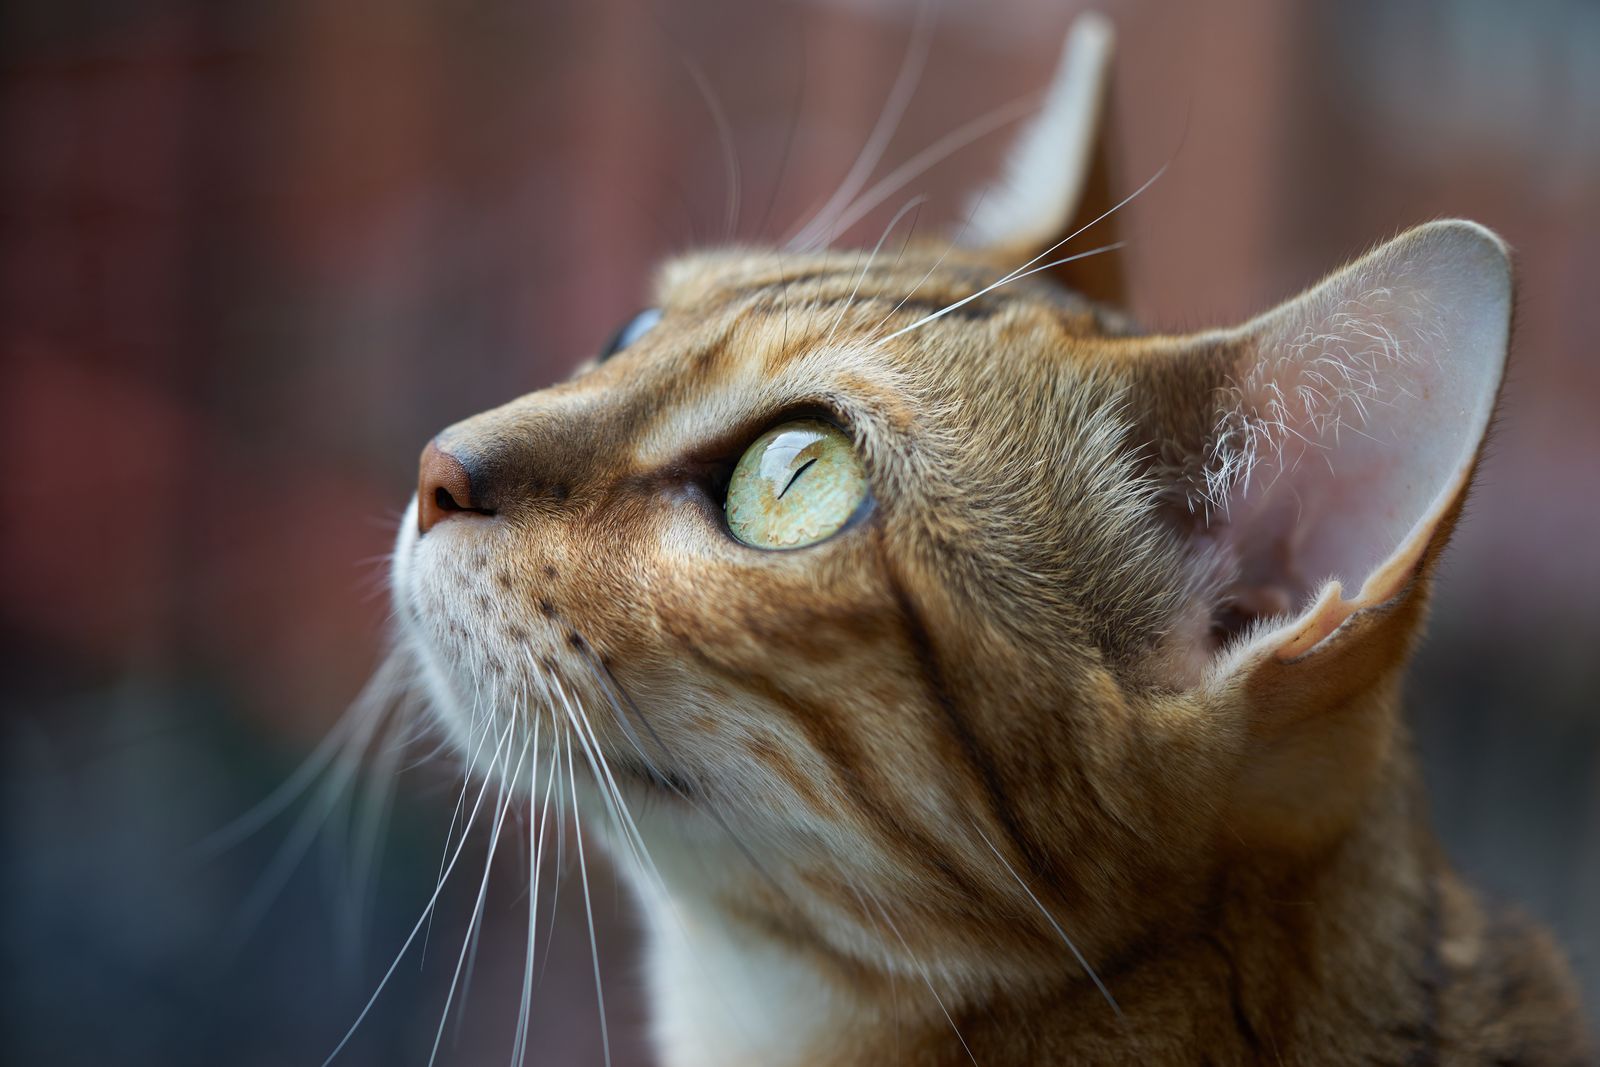
Final result
That is pretty much it actually. I mean, it's not rocket science but it still ends up being quite a lot of work! How long does this entire process take? For me it can even take a few hours for a single shot (especially if it's one I really like and I end up obsessing about it being perfect). If your eye is well-trained you will actually spot that in the final photo there are some slight inconsistencies with the focal plane, but to me the result is good enough.
Karashi managed to make me write again on my blog, I can barely believe that! If you got this far it means that you are a truly amazing person, thanks for reading! Maybe I'll write more, should I? 🤔 Meh...
